Build Your First AI Agent
Create, train, and deploy your first AI agent in under 5 minutes. Step-by-step guide for getting your intelligent assistant live.
Get a fully functional AI agent answering customer questions in minutes. This guide walks you through creation, training, testing, and deployment.
Prerequisites
You'll need an Umiplex account to follow this guide. Sign up for free if you haven't already.
What We'll Build
Set up a new agent and train it with your business data.
Use the Playground to test responses and fine-tune performance.
Make your agent live on your website or messaging platform.
Step 1: Create and Train Your Agent
Start from Dashboard
Sign into your Umiplex workspace and click the Create agent button.

Add Training Data
Choose one or more data sources to train your agent. Umiplex supports multiple formats:
Website Crawling
Automatically import pages from your website. Perfect for documentation sites, marketing websites, and knowledge bases.

Uploaded Documents
Upload PDFs, Word documents, or plain text files containing your business information.

Structured Q&A
Create question-answer pairs to teach your agent specific responses. Ideal for frequently asked questions you want answered exactly as written.
Configure Behavior
Set your agent's personality and response style by customizing its instructions.

Add custom Q&A pairs for special cases:

Train Your Agent
Review your selected data sources and start training.

Training typically takes 2-5 minutes depending on the amount of data. You can move to the next step while training completes.
Step 2: Test in the Playground
Once training starts, you'll be taken to the Playground—your testing environment.

Evaluate Quality
Test your agent's responses for:
- Accuracy — Are answers factually correct based on your training data?
- Relevance — Does it directly answer the user's question?
- Tone — Does it match your brand's voice?
- Completeness — Is the response helpful but concise?
Make adjustments to your instructions or training data based on what you find, then retrain if needed.
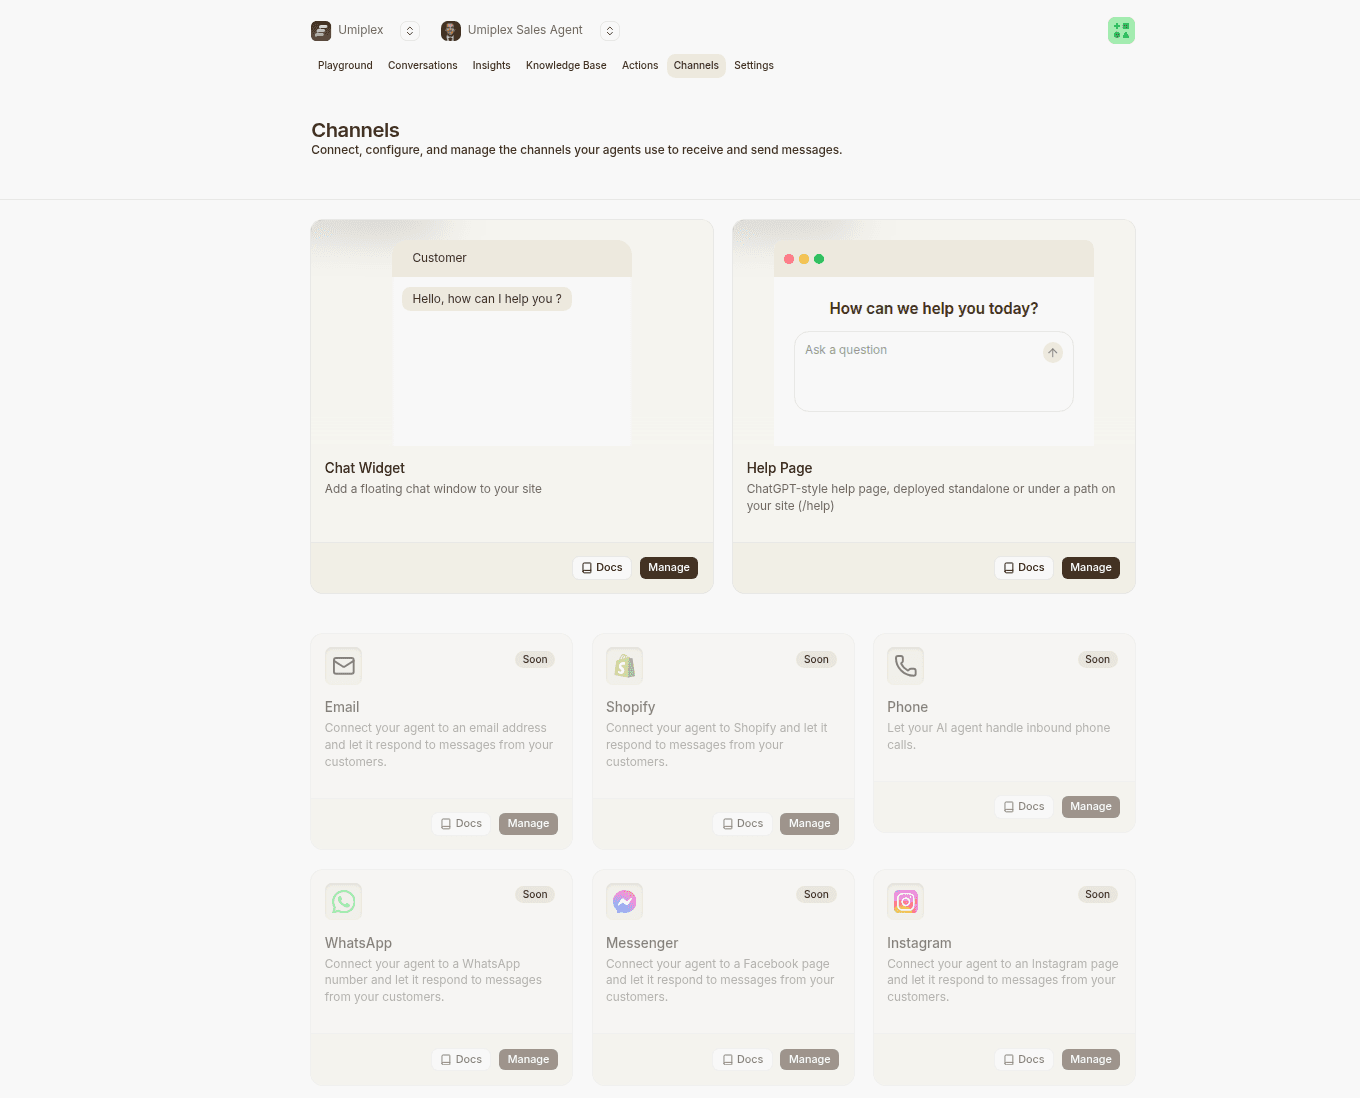
Step 3: Deploy to Your Website
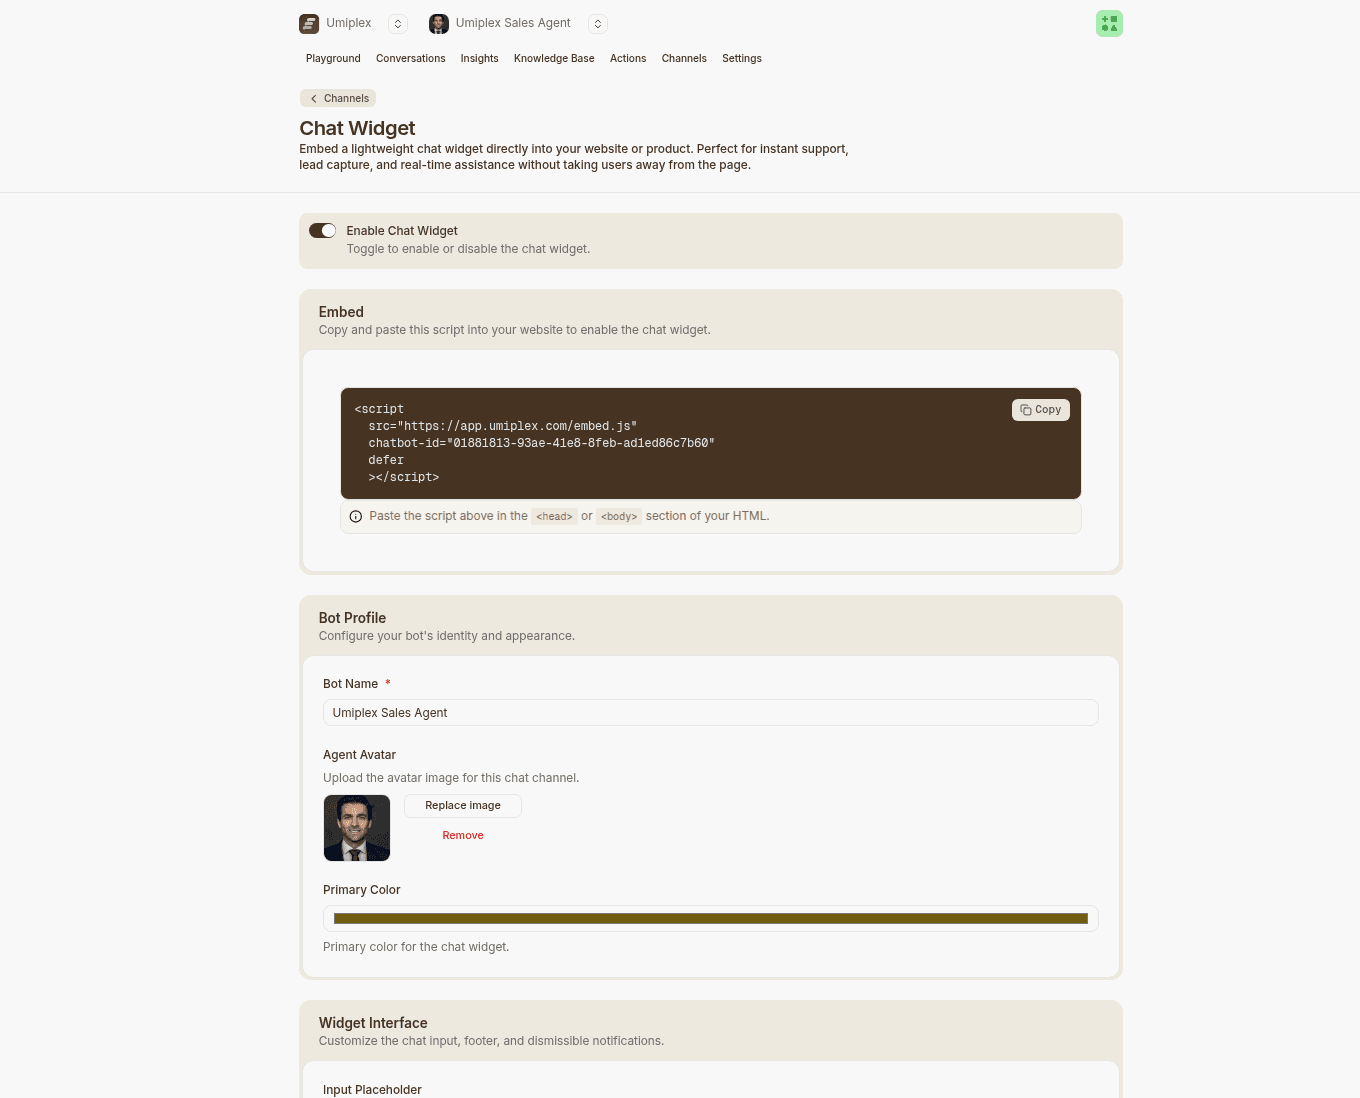
Enable the Chat Widget
Navigate to Deploy and toggle the Chat widget switch to enable it.
Disabled vs Enabled: Disabled agents are only accessible to workspace members. Enabled agents can be embedded on websites and accessed publicly.
Get Your Embed Code
Copy the JavaScript snippet provided in the Chat widget configuration.
Add to Your Website
Find the place to add code to your website's HTML. This is usually in the <head> section or before the closing </body> tag.
For best performance, place the script just before </body> so your page content loads first.
Locate Your Site's HTML
Find where you can add JavaScript to your website.
Best practice: Place the script before the closing </body> tag so your page loads quickly while the chat widget appears in the background.
Paste the Code
Paste the embed code into your website's HTML, save, and deploy.
Verify Deployment
Visit your website and look for the chat bubble. Click it to test the integration! 
Success! Your AI Agent is now live and ready to help your website visitors.
Next Steps
Your agent is now live. Here's what to do next:
- Monitor conversations in the Activity tab to see what users are asking
- Review analytics to understand usage patterns
- Improve responses by updating training data based on real conversations
- Explore deployments across other platforms (Slack, WhatsApp, Help page, etc.)
See Best Practices for tips on optimizing your agent.
Customize Appearance (Optional)
Want to match your brand? Check out our settings guide for style and content.

🎉 Congratulations!
You've successfully created, trained, tested, and deployed your first AI Agent! Here's what you've accomplished: